Standard component palette – showing the ActiveX container
New dBASE ActiveX Controls
dBASE has the ability to run ActiveX controls ever since they were introduced by Microsoft. Starting with dBASE PLUS 8, dBASE added additional ActiveX controls to the product enhance and augment the standard components that were included in previous dBASE releases.
dBASE also supports 3rd party ActiveX components. The .ocx or .dll files that accompany ActiveX controls must be deployed with your application.
Note: There are a few ActiveX controls that are not well-behaved and can cause issues with dBASE. One in particular is the Microsoft Silverlight OCX control. This control will make dBASE unstable and exit. PLEASE DO NOT USE THAT CONTROL.
Microsoft calls ActiveX objects, controls, or ActiveX controls. Once the ActiveX controls are added to dBASE’s Component Palette they are referenced by either ActiveX controls or ActiveX components. In dBASE, the only difference is if the control is installed on the component palette, then it would be called a component.
Installing new ActiveX controls in dBASE PLUS 9 or above
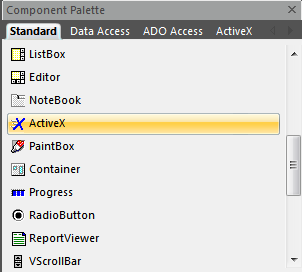
Installing ActiveX controls in dBASE is very easy and straightforward. There are two different methods for working with ActiveX controls in dBASE. The first is using an ActiveX container found on the main component palette as shown below:
Standard component palette – showing the ActiveX container
You just simply drop this component onto a form and set the classID under the Miscellaneous group in the Properties Editor. See the “Adding ActiveX components to the ActiveX component Palette” for more information. The second way to install the ActiveX controls on the ActiveX component palette.
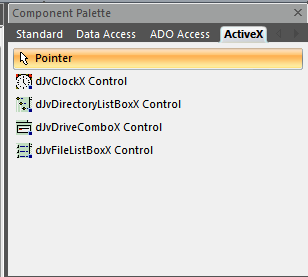
The ActiveX component palette after components are added
Adding components to the palette is very easy and simple and is covered in the next section.
Adding ActiveX components to the ActiveX component Palette
Once dBASE PLUS 9 or later has been installed, you can add the additional ActiveX controls to your component palette. dBASE already understands that the new components are ActiveX so that is not an issue.
1. Start dBASE
2. Create or Open a Form
3. Right mouse click on the component palette, the context menu should appear:
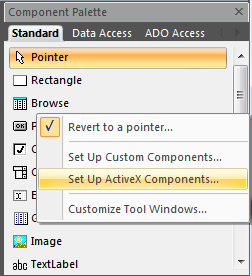
Context Menu to setting up ActiveX components
4. Select the Set Up ActiveX Components… menu item, this will display the following dialog:

Pick the ActiveX components you want to have on the ActiveX component palette dialog
5. Use the >, >>, <, << buttons to select the ActiveX controls you want on the component palette and when done, press the OK button to finish.
a. Note: The above list of ActiveX Components are the new ones included in dBASE PLUS 8 and above.
6. Now notice the new tab on the Component Palette… it states ActiveX and it now has the 5 ActiveX components selected above.
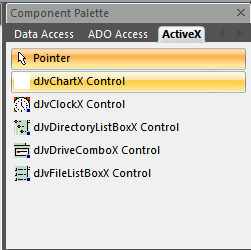
The added ActiveX components
7. Now the components are ready to use in your applications just like any other component.
Adding an ActiveX using the ActiveX container
On the main component page of dBASE you have an ActiveX container component.
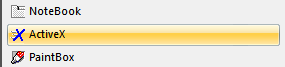
1. Choose that component and place it on the Form.
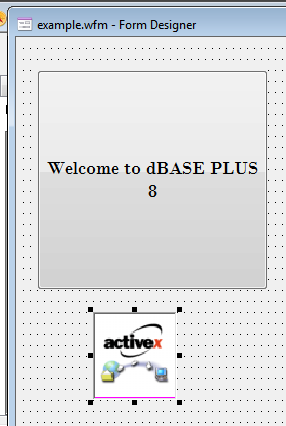
This is what the standard ActiveX container looks like before it has been assigned an ActiveX control. |
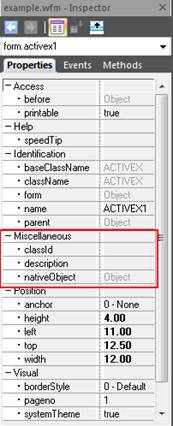
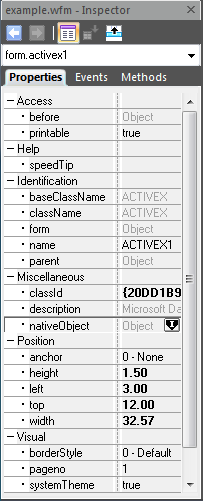
Now in the Inspector for the ActiveX, you will notice a Miscellaneous area of properties. This is where you are going to focus, when setting up an ActiveX. |
2. In the Inspector, set the classId property, click it, and select the Active wrench button in the property. This will start the Classid Property Builder dialog
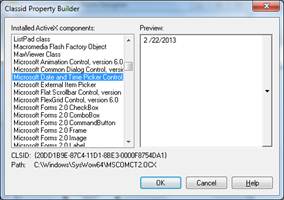
Select the ActiveX you want to use and assign it to the ActiveX container
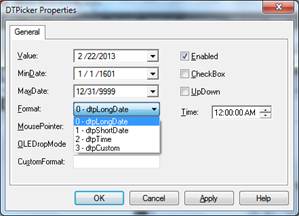
3. Most computers running Windows Vista and above will have the Microsoft Data and Time Picker Control as an ActiveX as shown selected above.
4. Click the OK button to pick that control to use
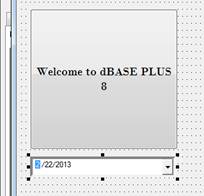
Microsoft’s Date and Time Picker Control
5. The ActiveX is now ready to use in dBASE.
Interacting with ActiveX(s)
Once you have picked an ActiveX to use, either by using the component palette or by using the ActiveX container the controls can be interacted with in the same way.
Properties Editors:
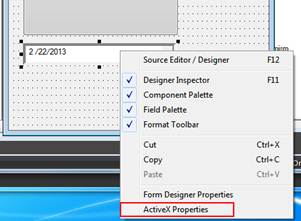
Some advanced ActiveX controls come with nice ActiveX property dialogs. Using the Microsoft Date and Time Picker Control – right-mouse click on the control, and the context menu will be shown:
Picking the ActiveX Properties from the context menu |
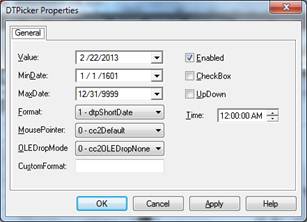
Selectable options for the ActiveX |
|
|
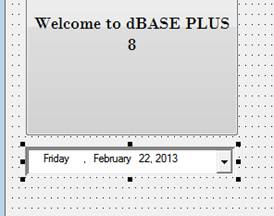
Notice changing a property in the ActiveX dialog will automatically show in the dBASE designer being used |
The changes in the dBASE designer after clicking the Apply button on the ActiveX properties dialog. |
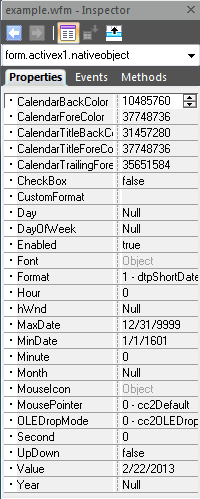
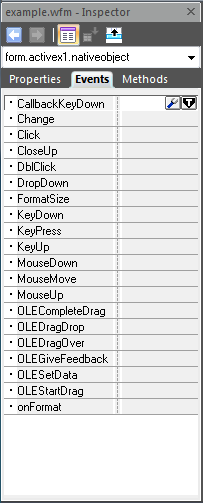
The other way to interact with ActiveX components is to use the Inspector and the nativeObject property. This method will use the ActiveX’s Properties, Events, and Methods to control the component.
Notice the nativeObject has the Inspect icon ready to click. |
Notice the Native properties for the Control. These properties can be set as any other property either in the Inspector or by code. |
Clicking the Events tab up at the top will give the ActiveX’s registered events. |
|
|
|
This works for both ActiveX controls and ActiveX containers |
|
|
Auto propagation of ActiveX components
After using the ActiveX container in dBASE, you may notice that the ActiveX is now on the ActiveX component palette. This is due to the nature of the ActiveX control. If it is a well-behaved control, it will self publish to the ActiveX component palette found inside dBASE.
Socket Tools 8.0
Starting with dBASE Plus 9 a new suite of ActiveX controls have been added to the ActiveX Tab in the component palette.
SocketTools is a suite of ActiveX controls and libraries for software developers who need to integrate Internet functionality into their Windows applications. Using SocketTools, you can easily add features such as uploading and downloading files, sending and retrieving e-mail, exchanging information with web servers, interactive terminal sessions, and remote system management.
SocketTools – File Transfer Protocol Control 8 – The File Transfer Protocol (FTP) control provides a comprehensive API which supports both high level operations, such as uploading or downloading files, as well as a collection of lower-level file I/O functions. In addition to file transfers, an application can create, rename, and delete files and directories, search for files using wildcards and perform other common file management functions.
SocketTools – Hypertext Transfer Protocol Control 8 – The Hypertext Transfer Protocol (HTTP) is a lightweight, stateless application protocol that is used to access resources on web servers, as well as send data to those servers for processing. The control provides direct, low-level access to the server and the commands that are used to retrieve resources (i.e.: documents, images, etc.). The control also provides a simple interface for downloading resources to the local host, similar to how the SocketTools FTP control can be used to download files.
SocketTools – Post Office Protocol Control 8 – The Post Office Protocol (POP3) provides access to a user's new e-mail messages on a mail server. Methods are provided for listing available messages and then retrieving those messages, storing them either in files or in memory. Once a user's messages have been downloaded to the local system, they are typically removed from the server. This is the most popular e-mail protocol used by Internet Service Providers (ISPs) and the control provides a complete interface for managing a user's mailbox. This control is typically used in conjunction with the Mail Message control, which is used to process the messages that are retrieved from the server.
SocketTools –
Simple Mail Transfer Protocol Control 8 – The Simple Mail Transfer
Protocol (SMTP) enables applications to deliver e-mail messages to one
or more recipients. The control provides an interface for addressing and
delivering messages, and extended features such as user authentication
and delivery status notification. Unlike Microsoft's Messaging API (MAPI)
or Collaboration Data Objects (CDO), there is no requirement to have certain
third-party e-mail applications installed or specific types of servers
installed on the local system. The control can be used to deliver mail
through a wide variety of systems, from standard UNIX based mail servers
to Windows systems running Exchange or Lotus Notes and Domino.
SocketWrench Windows Socket Control 8 – The SocketWrench control provides a simplified interface for the standard Windows Sockets API used to develop Internet and intranet applications using the TCP/IP protocol. With SocketWrench, you can create both client and server applications, as well as send and receive UDP datagrams.
Note: Remember that not all components are well behaved and some can make dBASE unstable or even crash. There are 1000’s of ActiveX(s) on the market today and internal and external testing of each component will be needed to ensure proper functionality.