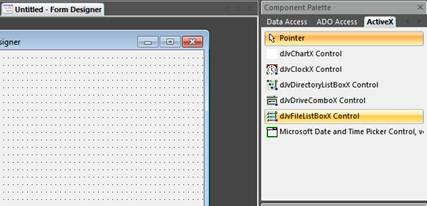
Selecting the dJvFileListBoxX control
Using an ActiveX container and Control in the same project
This simple example will provide a general overview of using ActiveX controls in an application.
1. Start dbASE
2. Create a new form
3. Select ActiveX tab
. Note: this
example makes the assumption that you have already added the ActiveX controls
to the Component palette.
You will find the steps here: Adding
ActiveX to dBASE PLUS 9
Selecting the dJvFileListBoxX control
4. Click the dJvFileListBoxX control and add it to the form
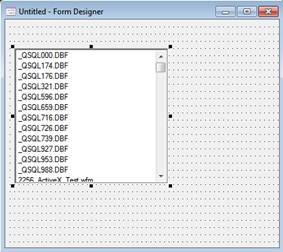
Form after ActiveX component is dropped on it, showing live data
5. Now add a few components:
a. 5 – Textlables – these are for information
b. 1 – Entryfield – this is for the extensions
c. 1 – Pushbutton – this is for sorting on the extension
The form layout should look something like this:
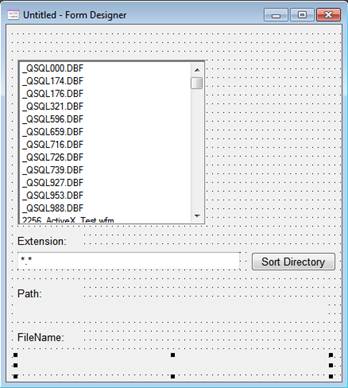
After the objects have been setup and labeled
6. Now the components need to be wired to work with the interface.
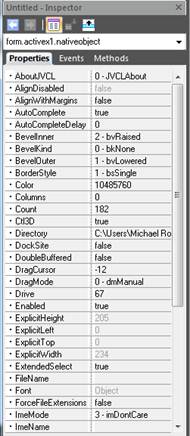
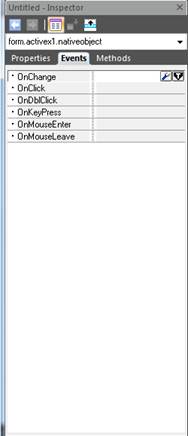
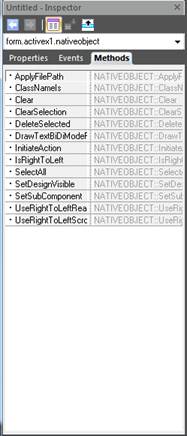
7. The first step is to connect the file list to the Path and FileName labels. This can be done with the ActiveX – Native Properties, Events, and Methods. To get to the nativeObject properties, click the nativeObject property of the control, to display the following :
nativeObject’s Properties |
nativeObject’s Events |
nativeObject’s Methods |
8. We can use the nativeObject’s Events – OnChange to update the Textlabel objects on our form. Click on the Events tab for the nativeObject, then click the active wrench on the OnChange event.
function nativeObject_OnChange
form.textlabel3.text = form.activex1.nativeobject.directory
form.textlabel5.text = form.activex1.nativeobject.filename
return
9. Now, Save the form and test it out. You should notice that every time you change the file selected, the FileName: text changes.
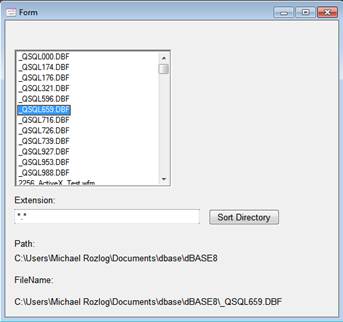
Application running and showing the Path and FileName
10. Back to Design mode as we have a few more things so add:
In this example, the directory that is being used has various dBASE file types. One of the most common is the *.dbf. The next steps will be to show how to filter just those files in the interface.
11. Now click the PushButtons’s OnClick Event and add the following code
function PUSHBUTTON1_onClick
form.activex1.nativeobject.mask = form.entryfield1.value
return
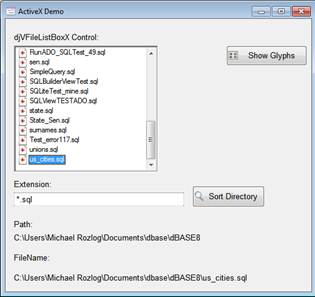
12. Save and run the Form. To display only the .dbf files in the example directory, type “*.dbf” in the extension Entryfield and press the Sort Directory button. Notice the FileListBox will only show the files with those extensions.
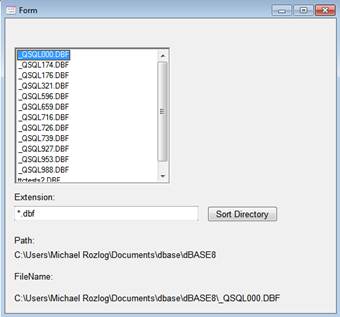
Application showing only *.dbf files in the dJvFileListBoxX
13. The final task we want to show with our dJvFileListBoxX ActiveX component is to add the graphic glyphs back to the files listed for easier recognition.
14. Add another PushButton
a. Name it Show Glyphs
15. Click the new PushButton’s|Events|OnClick and add the following code:
Function PUSHBUTTON2_onClick
form.activex1.nativeobject.showglyphs = true
return
16. Now Save, and Execute the form:
a. Click the Show Glyphs button
b. Put in an Extension – for this example I will use *.wfm
c. Results should look something like:
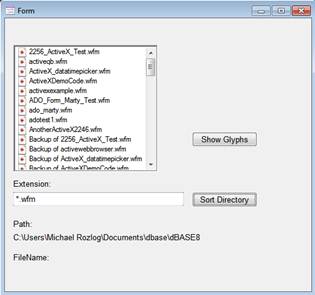
Application only showing *.wfm(s) with Glyphs turned on
17. In this example, we learned how to mix native dBASE forms and controls with the new ActiveX controls. There are many other things that can be done using these new controls and this is just a simple introduction. The sky is the limit to what you can accomplish with the new controls.
Finished Example using new ActiveX controls